
Showing posts with label a. Show all posts
Showing posts with label a. Show all posts
Thursday, April 27, 2017
How to make a folder transparent or invisible
How to make a folder transparent or invisible
 STEP 1
first create a new folder somewhere on your hard drive or just rename(f2) an existing folder
STEP 2
when you name it hold down "Alt" and press "0160" this will create and invisible space so it will apper as if it has no name.( If it doesnot work try alt +255 )
then right click in and select "Properties" select the tab "coustimize" and select "change icon" scroll along and you should a few blank spaces click on any one and click ok when you have saved the settings the folder will be invisible or purely transparent .....
lets check it and enjoy.................
Available link for download

How to Increase your Android phone a huge speed boost !! just like Apple speed up iOS 7 1
How to Increase your Android phone a huge speed boost !! just like Apple speed up iOS 7 1
Overview Increase Android phone Speed
Today, I am talking about how to increase android phone like a Apple phone .I am really Enjoy the Apple Phone speed on my Android phone Apple released its eagerly anticipated iOS 7.1 update last week and while the new software added a bunch of great new features and cleaned up a few annoying bugs, there is one thing in particular that stands out as the best thing about iOS 7.1: the speed improvements. Apple’s new iOS 7.1 software is incredibly fast on iPhones and iPads, and the difference completely changes the user experience for the better. But why should iPhone users have all the fun?

Three Settings of Android
With a few simple adjustments to three settings, you can enjoy the same great speed improvements on your Android smartphone or tablet.
One of the many great things about Android is its flexibility. Google’s mobile software is open to all kinds of third-party tweaks and enhancements, but it also has some built-in features that save
owners can take advantage of to change the user experience. One such feature allows Android device users to dramatically speed up the transition animations that display when they switch apps and when windows open and close.
The tweaks are available within the settings of all recent Android phones in a section called “Developer options.”
This section might be hidden on some phones, but it’s very easy to access. On many phones, you just have to open a certain page in the settings and tap a button seven times. Use Google to figure out how to enable Developer options on your phone if it’s currently hidden (for example, search “enable developer options HTC One”).

Once you have access to Developer options, simply scroll until you find the following three settings, which may be located on the main screen or within an “Advanced” subsection:
- Window animation scale
- Transition animation scale
- Animator animation scale
Tapping each of the three aforementioned settings will reveal that it’s set to “1x” by default. If you want to speed up your phone or tablet dramatically, simply change each of those three settings to “.5x” — that’s it.
Just as iOS 7.1 completely changed the feel of the iPhone user experience by speeding up transitions, this will do the same for Android devices. Adjusting these settings also shouldn’t really have any impact on battery life, though if you’re using an older phone with a slower processor you may see some choppiness.
Available link for download
Tuesday, April 25, 2017
HOW TO CREATE A SUCCESSFUL BLOG
HOW TO CREATE A SUCCESSFUL BLOG
ts easy to build a blog, but hard to build a successful blog with significant traffic. Over the years, weve grown the Moz blog to nearly a million visits each month and helped lots of other blogs, too. I launched a personal blog late last year and was amazed to see how quickly it gained thousands of visits to each post. Theres an art to increasing a blogs traffic, and given that we seem to have stumbled on some of that knowledge, I felt it compulsory to give back by sharing what weve observed.

1. Write Well and Write Often
Frequently updating your blog with useful content is the first step to building your blogs audience. The content you write is what will keep readers coming back for more. Make sure you have something meaningful to say to them and say it often to maintain their interest and keep them loyal.
2. Harness the Power of Comments
Commenting is a simple and essential tool to increase your blogs traffic. First, respond to comments left on your blog to show your readers that you value their opinions and draw them into a two-way conversation. This will increase reader loyalty.
Second, leave comments on other blogs to drive new traffic. Make sure you leave your blogs URL in your comment, so you create a link back to your own blog. Many people will read the comments left on a blog post. If they read a particularly interesting comment, they are highly likely to click on the link to visit the commentors website. Its important to make sure you leave meaningful comments that are likely to invite people to click on your link to read more.
It’s not an easy task, but if you do things right from the beginning you will start receiving some traffic and it WILL start to increase over time. I’m suggesting you to follow those methods below, and if you do, you will see some results. However, don’t wait for a miracle and be prepared to wait at least 2-3 months for decent traffic flow.
Make a public announcement on your social media profiles that you’ve started blogging
Most people are present on different social media platforms, such as; Facebook, Google+, Twitter and others. Check where you have the biggest number and most active followers and make a public announcement that you’ve started a blog that covers [TOPIC]. Write your industry/niche there and add a link to your blog. The first readers are usually your friends, family and acquaintances. They are easy to catch online.
Optimize Your Content
The initial structuring of a blog should evolve around designing it to attract maximum traffic. Pages on your blog can be optimized to attract readers and potential consumers. This can be done by organizing content by putting it into categories that will enable readers to find what they are looking for quickly and easily.
This includes sub-titles, bullet points and lists.
Search engines pick up on themes of related content, so include keywords and keyword phrases. If you work a little on your blog’s SEO (Search Engine Optimisation) in this kind of way, you’re likely to get more search engine traffic.
Submit the Blog to Search Engines
All of the major search engines have dedicated link sites that allow users to submit URLs to their engines. There are also directories that you can submit your site to. This can be done manually, or services can be hired to do the submissions for you. The results do not happen overnight.
Sometimes, it can take weeks for the blog to show up. But it is a good way to get the search engines to crawl it and pick it up in someoneís search results.
Available link for download
Saturday, April 22, 2017
How to install a new hard disk
How to install a new hard disk
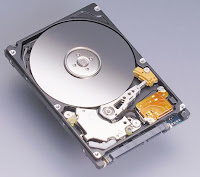 How to install a new hard disk? Running out of hard disk space, yet also want to keep all the files that are currently on the system in perfect order? Install an extra hard disk, and see your available space rise!
Firstly, make backups of your existing system files. You may never know when these may come in handy. If your current hard disk may go down the pan, youll be glad to have something to start with again. Also, if you want to use all your data that is on this drive, back it up anyway; ready to be transferred to the new drive. Also, create a system disk for your PC. This can be created by going to Control Panel > Add/Remove Programs, and then the "System Disk" tab. The instructions should be there for you. "WHEN I INSTALLED MY EXTRA HDD I DDNT FOLLOW ANY OF THE ABOVE MENTIONED....INSTEAD JUST OPEANED THE CABINET AND LOOKED FOR THE WIRES AND CONNECTED THEM ...ANY ONE CAN TELL WHERE THE CORRECT WIRE GOES ..... THE MAIN THING IS TO MAKE SURE THAT THE BROAD THIN GRAY WIRE OR DATA CABLE SLOT WITH THE WORD P2 IS CONNECTED TO THE EXTRA HDD"
Once you are prepared on the software side, turn off your PC and open the case to your PC (Please take proper precautions at this point. Anti-static wristbands and other such devices should be used. If you dont have these, just make sure you are properly earthed, and know what you are going to do. Oh, and please turn off the PC properly. I dont want you dying on me, literally!). The hard disk is the metal box shaped thing that is either the size of the floppy drive or it could be the size of the CD-Rom drive. It should be easy to spot, because it might even say "Hard Disk" on it. At this point, look and see where you can put the new drive, and how you are going to connect it up. If there is no hard drive in there, then dont worry; Ill explain how to connect it up as well.
Look at the end of the HDD. It should have a load of sockets and pins for you to play around with. At one point, you should be able to see some pins with some jumpers attached, and a sticker on another side telling you what configuration of jumper positions means what to the computer. If you are attaching it to the same IDE cable as your existing drive, then set it to "Slave", otherwise, select "Master" and fit it as close to the start of the cable as possible (The start of the cable being where its connected to the motherboard).
This cable is an "IDE" cable, and can only be fitted two ways to the drive itself. Look for an indication as to which side pin number 1 is (Look for stickers again!) and insert the IDE cable in that socket and pins, with the red side as close to pin 1 as possible. Then, just fit it into the computer, as you would do any other drive (For the thickies, which means attaching it to the case using the mounting screws that should come with the PC. Before you do this though, note down the extra information on the top of the drive, usually the number of cylinders, heads, sectors, and any other information. Next, connect one of the power cables to the HDD (These are the 4 cable collections with connectors attached, which leads from the power supply unit), and close the PC case.
Next, you will have to mess with CMOS. Turn on the PC, and hit whatever key you are told to at the bootup to get to the CMOS menus. When in there, choose the relevant section (We cant say exactly, because there are many different CMOS set-ups around) and select "IDE Auto-detection". If the hard disk does not appear on it, then you will have to enter the information manually. Use the notes you collected from the top of the hard disk earlier to tell the computer what the hard disk is.
IMPORTANT:
Afterwards, insert the system disk("THE BACKUP DISK THAT CAN BE CREATED BY RIGHT CLICKING A DRIVE4R AND SELECTING FORMAT AND THEN THE CREATE BACKUP DISK OPT") prepared earlier and "Save" your editing of the CMOS and exit. The system disk should work instead of the original hard disk (Or if you are installing from scratch, then it will boot from the A: anyway).
Type "fdisk" at the dos prompt. This runs a program called, surprisingly, FDISK. Tell the computer which drive ie the harddisk is the new one (Please choose the correct one at this point. Make a mistake, and you really could be using those backups!), and then tell it what partitions you want (Dont worry about it, as there are full instructions while you are running the program). Once this is done, you can reset your PC (Except if this drive is being installed from scratch and is on its own. If this is the case, then you can format the drive by typing "format c:" This will format the drive for you, but whats really good is if you type "format c: /s" instead, as this installs some important files at the same time. Then, just follow the instructions to install whatever OS you are going to use.)
If you are adding this drive as a second HDD, Go into Windows (Or any other OS, but the instructions may be different!) and then format from "My Computer" like you would a floppy disk. There you go: A newly installed hard disk, with minimum effort!....and dont take the risk of formatting any of the drives u know!!!! if in doubt contact me here or dont do at all........."SOD will not be held responsible for any data lost in this process".
Available link for download
Tuesday, April 18, 2017
How can I capture a video of my screen in fedora
How can I capture a video of my screen in fedora
Use VLC Player
How to install vlc?How to make a screencast using Vlc?
from a terminalsu -c yum -y install vlc

Select OPEN MEDIA
Select CAPTURE DEVICE tab
Change capture mode to DESKTOP
Change Options to 25 f/s
Choose CONVERT option instead of play option
In the Convert window add the destination file via the BROWSE
button then name the file TEST.MPG (VLC does require the extension so the file becomes TEST.MPG rather than just TEST)
Change the PROFILE to VIDEO - H.264 + AAC (TS)
Click the setting button and change the VIDEO CODEC options to:
BITRATE 1200kb/s
FRAME RATE 25.00 fps
Click SAVE
Choose the DEINTERLACE option
Click START
Available link for download
Monday, April 17, 2017
How to Detect a Two Way Mirror Glass and Stay Safe
How to Detect a Two Way Mirror Glass and Stay Safe
Two-Way Mirrors could be anywhere these days, as the technology has evolved we are entering into a next dimension where few things are making life easier but some of them are making it a HELL. Well a Two-Way mirror is not an exception, using a 2-Way mirror one can easily look what's happening on the other without the consent of other person. Hence this technology is being used by Police to interrogate the criminals but side by side some other people are using it too peek the dirty things and record them for further use.
Available link for download
How to Install GVIM a powerful text editor in Ubuntu 11 04 Natty Narwhal 10 10 and 10 04
How to Install GVIM a powerful text editor in Ubuntu 11 04 Natty Narwhal 10 10 and 10 04
GVIM is the graphical "implementation" of the command-line text editor (an IDE actually) called the Vim. Although may not certainly be as "connected" as with the GNU EMacs, but Vim text editor also has a quite long history with GNU/Linux thus it comes pre-installed by default in almost all the GNU/Linux distributions.
But for the obvious reason of not having a GUI, Vim (which is also based on another editor called "Vi") is not that popular among the typical GNU/Linux users but other advanced boys and gals such as system administrators still use it quite often since it allows us to edit any text (+ editing programming language code files) file without having to log-into a graphical user interface to this day nonetheless.
In short, it a GUI written using the GTK+ tool-kit (aimed at Gnome desktop, but you can use it in any desktop you want), but since it uses the Vim as the "engine", youll be getting almost all of its features in a very user-friendly graphical environment!.
Main features...

*. Change font (size, bold, italic, etc).
*. Find and replace.

*. Undo/Redo.
*. Automatic spell checking.
*. Open multiple windows by splitting the window by horizontal or vertically.
*. A "file explorer" of its own which lets you locate and load files to the window for editing.
 |
| The "command-line" type, file explorer to the left... |
*. Text wrap.
*. Send to print... are among the features that interests the standard users.
As mentioned, Vim is actually a programmer friendly text editor, thus GVIM also lets you do other things like Syntax editing, set compilers, "Make" files (compiling), etc which are again, not that useful for the usual users.
You can install GVIM in Ubuntu 11.04 Natty Narwhal, 10.10 and 10.04 by using the below command in your Terminal window.
sudo apt-get install vim-gtk
But, just like with GNU/Emacs, this is not for everyone. For instance, if you enter its settings window, then almost all the settings are activated using commands! rather than graphical tools.
But still, if you usually deal with a lot of Syntax editing or HTML/XML editing... then GVIM is a fast and feature-rich front-end to the original Vim "engine" nonetheless.
But as a final verdict, in my humble opinion, if youre looking for something to replace the Gedit type text editor for instance, then you should have a look at something like the Leafpad or Mousepad or even the awesome FocusWriter will certainly suite rather than the GVIM.
Available link for download
Thursday, April 13, 2017
how to make a bootable USB Windows 7 and other Windows versions
how to make a bootable USB Windows 7 and other Windows versions
Free software that we will use to create a bootable USB this time it was Rufus.
1. Rufus is very light and most rapidly than software like. The file size was very small, only about 400 KB only.
2. Easy to use to create a bootable USB from a bootable ISO file (Windows, Linux, etc.)
3. It has a variety of other functions such as low-level utility, flash the BIOS or other firmware.
4. Download Rufus
Download Rufus 1.1.3
5. Make sure the USB drive has been installed on your computer, then run rufus_v1.1.3f.exe
6. Make sure you check the "Create a Bootable Disk Using". If you want to create a bootable USB Windows 7 or any other version, use the "ISO Images" as the source. Then click the browse button that is next to it.
7.Pilih ISO file you want and click "Open".
8.Klik start to begin to create a bootable flash.
its easy right ...
Available link for download
Wednesday, April 12, 2017
How to Create a Photo Caricature in Adobe Photoshop
How to Create a Photo Caricature in Adobe Photoshop
Tutorial Assets
This tutorial requires two files. Both are available through the Download Attachment link found with this tutorial. The files you will need are:- A portrait photo. Feel free to use one of your own, or use the same one I used.
- A textured background. I created this one using the Adobe Texture Paper Pro extension.

1. Basic Photo Preparation
The essential technique for creating a caricature is to find elements that are already naturally pronounced, and exaggerate them to a comical degree. In our starter photo here, the young mans jaw line is rather large, and his smile is very prominent. The horn-rimmed glasses are noticeable and the hairline looks like its beginning to recede. These are all aspects of his portrait we can have fun with.
Step 1
The solid white background of the portrait makes it easy to extract the figure from the background. Use the selection technique of your choice—I used the Quick Selection Tool (W) to craft the selection—and then go to Layer > New > Layer Via Copy (Control-J) to create a cutout layer of the man.
Step 2
Its much easier to work with particular features if they are isolated. So use the same technique to cut out the following individual elements. The body and clothing layer should follow the neckline of his shirt.


Step 3
Just to keep things as flexible as possible, lets transform each layer into a Smart Object. Grab each layer individually and go to Layer > Smart Objects > Convert to Smart Object.
2. Transform and Warp
Now that the different features are all on their own layer, we can begin transforming them into an exaggerated caricature. Use the flexibility of the Smart Objects to work with different size combinations to get a humorous effect.Step 1
A common caricature technique is to make the head extremely large in proportion to the body. To accomplish this, shrink the body layer down significantly with Edit > Free Transform.
Step 2
Use Edit > Transform > Warp to begin shaping the head layer. Fit the neck into the neckline of the shirt and inflate the top of the head. The goal of this step is just to establish the basic shape of the head, and that serves as a foundation for the other layers to build on.
Step 3
Distort the chin layer to elongate it and sharpen it slightly. Try to keep the top aligned so the seams are not overly visible.
Step 4
Make that big grin even larger by stretching out the mouth layer.
Step 5
Caricatures frequently make noses extremely large and exaggerated. Big noses just look funny! Expand the nose layer to comical proportions—even if it overlaps the mouth, its OK.
Step 6
The glasses layer requires more attention than the simple scaling we used with the other features. The Edit > Transform > Warp tool can be used to help fit the expanded frames onto his face.
Step 7
All the distortion has nearly eliminated the ear on the base head layer. Good thing we have an ear layer to scale up so that it can support the heft of those glasses!
Step 8
Now add a Layer Mask to each layer and use a soft brush with black paint to blend the individual elements into a cohesive whole.

Step 9
Add a new layer above all the cutout layers and use the Spot Healing Brush (J) set to Sample All Layers to paint over any obvious seams or trouble areas that escaped the masking process.
3. Fluid Faces
Next up is the true power behind the caricature process. Its the infamous Liquify feature. Weve already done much of the warp work with the different transformations, but its the Liquify feature that is really going to create a fluid, funny, exaggerated appearance. The Liquify tools are powerful and can be unpredictable, but fortunately the feature supports Smart Filtering, so theres no worries!Step 1
Select all of the cutout layers and the seam cover layer and merge them into a single Smart Object with Layer > Smart Object > Convert to Smart Object.
Step 2
Go to Filter > Liquify. When the dialogue box comes up, check the Advanced Mode to reveal additional controls.
Step 3
Use the Forward Warp Tool with a brush size around 200 to increase the size of his forehead. Gently push the skin area up towards the hairline.
Step 4
Use the Bloat Tool to click a few times on the tip of his nose to make it look more bulbous.
Step 5
Use the Freeze Mask Tool to highlight the frames of the glasses. This will prevent the frames from distorting while we work with the eyes.
Step 6
Use the Forward Warp Tool again to exaggerate the shape of the temple area, and the Bloat Tool to create a slightly larger shape to the eyes—just be sure to reduce the size of the brush to be similar in size to the eyeballs. When finished, click the None button in the Mask Options to unfreeze the masked area.
Step 7
Extend the chin a bit more using the Forward Warp Tool and create a more rounded, bulbous end with the Bloat Tool.
Step 8
Finally, make his smile even bigger by using the Forward Warp Tool to push the corners of his mouth up into the folds on his cheeks. Just be careful not to warp the shape of the teeth.

4. Artistic Background
Now that weve twisted up this poor mans face, lets make it look more like a painted image. Well start by having a more artistic background.Step 1
Add a Layer Mask to the caricature layer and use a textured brush to fade the bottom of the layer out. I chose the Sponge Brush Projection brush preset here. Reduce the Brush Opacity setting to around 40% so the texture builds up gradually.
Step 2
Open the BackgroundTexture.jpg file from the tutorial assets and place it as a layer underneath the caricature layer.
Step 3
Add a new layer over the textured background. Use the same textured brush from the mask work to add in a white brushed border effect.
5. Painted Effect
Now we are ready to transform the caricature itself into a painting. We want to retain some of the photographic qualities, but still give the impression of a hand-painted piece. This is easily done using a smudge painting technique.Step 1
Smaller details tend to disrupt the smudge painting process, so its best to smooth them out first. Go to Filter > Blur > Smart Blur. Use a Radius of 2.0 a Threshold of 10.0, with Quality set to High.
Step 2
The highlights in the photo appear a little bright. Correct this by clipping a Curves Adjustment Layer to the caricature layer and using the Curves to decrease the bright areas.
Step 3
Create a new layer at the top of the layer stack. Grab the Smudge Tool with a Brush Size around 40 pixels. Set the Strength to 80% and check the Sample All Layers option. Then begin smudging along the major features of the image. Follow along with the natural grain of the skin to keep the appearance very fluid.
Step 4
Reduce the brush size to about 5 pixels and begin smudging along the smaller details of the image like the eyebrows, individual strands of hair, his eyes, and his teeth.
Step 5
Create a merged layer of the smudge layer, the caricature layer and the adjustment layer by selecting all of them and holding down the Alt key while going to Layer > Merge Layers (Control-E). Then go to Filter > Other High Pass set the Radius to 5.0 Pixels. Call this layer Details.
Step 6
Change the Details layer Blending Mode to Overlay, reduce the Opacity to 78%, and then go to Layer > Layer Mask > Hide All. Use a soft, white brush on the mask to reveal the details in the eyes, eyebrows, nose, mouth, and beard.
Step 7
Add a new layer called Dodge/Burn and fill it with 50% gray through the Edit > Fill feature. Set the Blending Mode to Overlay and then use a soft Black brush at 30% Opacity to simulate a Burn effect. Switch to White to simulate a Dodge effect.
Step 8
Add a final color effect. First create a merged layer of all the layers by holding down Alt while going to Layer > Merge Visible. Then go to Filter > Camera Raw and set the Contrast to +10, Clarity to +22, and the Vibrance to +48.
Done!
And now you are finished! Behold your amazing photo caricature work. Now take these techniques and go apply them to photos of your friends and family to create some fun, unique, and personal portraits!
Available link for download
Subscribe to:
Posts (Atom)