Tuesday, November 8, 2016
How to create a bootable Windows 7 USB flash drive
How to create a bootable Windows 7 USB flash drive
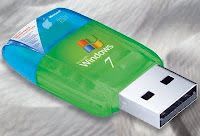
 You may know this fact that,we can boot windows from any sources like other networks,usb,cd etc.In this article,I will show you how to load the Windows installation on to your USB flash drive and make it bootable just like the DVD.Booting Windows from a USB flash drive has several advantages.First of all, the overall speed of the installation process will increase significantly, carrying a USB stick is much more convenient than a DVD, and finally it becomes possible to install the OS even on those systems that do not have a DVD drive, such as a notebook pcs or systems with only cd drives.
REQUIREMENTS
- USB flash drive with a minimum capacity of 4 GB.
- Windows 7 set-up DVD.
STEPS TO MAKE A BOOTABLE USB
1. Plug-in your USB flash drive to USB port.
2. Open Command Prompt with admin rights. Use any of the below methods to open Command Prompt with admin rights.
- Type cmd in Start menu search box and hit Ctrl+ Shift+ Enter.
- Go to Start menu > All programs > Accessories, right click on Command Prompt and select Run as administrator.
3. Type the command DISKPART and hit enter to see the below message

4. Next type LIST DISK command and note down the Disk number (ex: Disk 1) of your USB flash drive. In the below screenshot my Flash Drive Disk no is Disk 1.( Disk 0 will be your harddisk )

5. Next type all the below commands one by one. Here I assume that your disk drive no is “Disk 1”.If you have Disk 2 as your USB flash drive then use Disk 2.Refer the above step to confirm it.Make sure that each is completed successfully.Refer the screenshot given below to know possible success messages
SELECT DISK 1
CLEAN
CREATE PARTITION PRIMARY
SELECT PARTITION 1
ACTIVE
FORMAT FS=NTFS QUICK
ASSIGN
EXIT

Don’t close the command prompt as we need to execute one more command at the next step. Just minimize it.
6. Next insert your Windows7/Vista DVD into the optical drive and check the drive letter of the DVD drive. Here my DVD drive letter is "I" and USB drive letter is “J” (open my computer to check this).
7. Maximize the minimized Command Prompt in the 4th step.Type the following command now:
I: CD BOOT and hit enter.Where “I” is my DVD drive letter.( give your DVD drive letter )
CD BOOT and hit enter.
8. Type another command given below to update the USB drive with BOOTMGR compatible code. CD BOOT and hit enter.
BOOTSECT.EXE /NT60 J:
( replace J with your usb drive letter )
Once you enter the above command you will see the below message.

9. Now this is the final step,just Copy all the contents of Windows 7/Vista DVD to the USB flash drive.
10. Thats it you are done !!!!!!! Your USB drive is ready to boot and install Windows 7/Vista. Just change the boot priority at the BIOS to USB from the HDD or CD ROM drive.( normally F12 or F8 ,shortcuts for selecting the boot device )
If you found this article useful please feel free to pass your comments.All your feedbacks are precious.
Available link for download